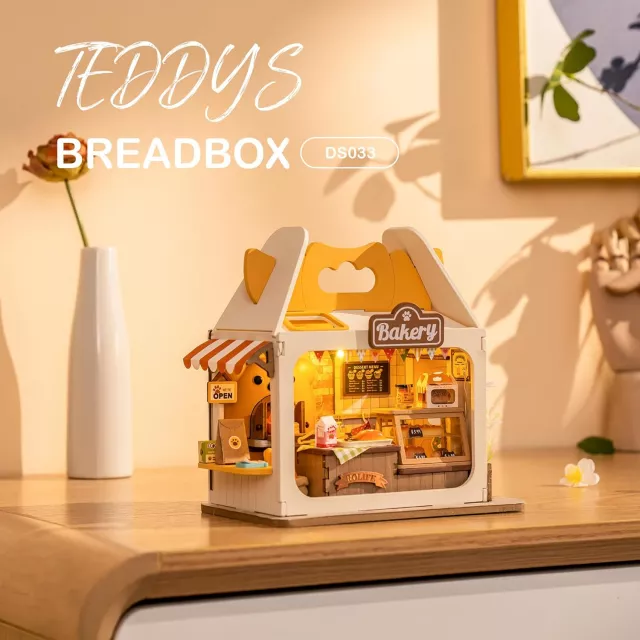
Miniature Bakery Diorama Kit with LED Food Box Shop
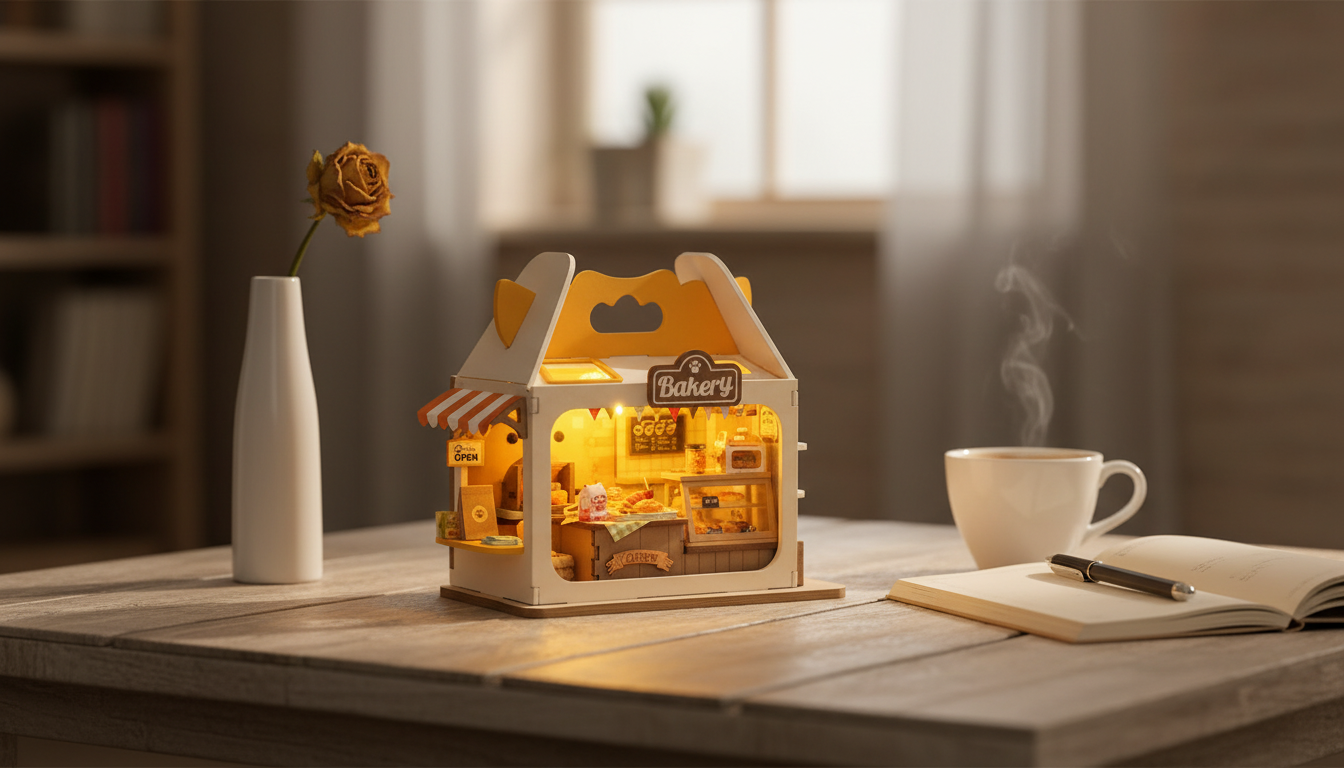
DIY Miniature Dollhouse Bakery Kit with LED – Food Box Shop Diorama Set
Create a tiny bakery scene with detailed shop elements and a working LED light for a cozy, display-ready finish. This kit suits careful, hands-on crafting and makes a charming gift for miniature lovers, hobby builders, and creative kids (with supervision).
What Makes This Mini Bakery Diorama Special
- Bakery-themed miniature shop scene designed to look like a small “food box” storefront display
- LED lighting adds a warm, realistic glow for shelf, desk, or dollhouse display
- Hands-on build that encourages patience, fine-motor skills, and visual storytelling
- Compact décor piece once finished—ideal for bedrooms, craft rooms, or office desks
Quick Product Snapshot
- Best for: miniature hobbyists, craft lovers, gift-givers, and supervised kids’ projects
- Good to know: set aside uninterrupted time; small parts require a tidy workspace
- Works well as: a display diorama, a dollhouse accessory scene, or a collectible build
At-a-Glance Details
| Detail | Value |
|---|---|
| Product name | DIY Miniature Dollhouse Bakery Kit with LED – Food Box Shop Diorama Set |
| Price | $18.38 (USD) |
| Stock (listed) | 50 |
| Category | Kids & Babies |
| MPN / SKU | 38831 / 14:29 |
| Lighting | LED (built-in effect; assembly required) |
What’s Typically Included (And What to Have Ready)
- Miniature structural components for the shop façade and interior scene
- Decor pieces to create a bakery counter/display look (tiny foods, packaging-style details, signage accents)
- LED lighting component(s) to illuminate the scene after assembly
- Common extras to keep nearby: precision tweezers, craft glue, small scissors, a ruler, and a tray to prevent part loss
- Workspace tip: use a light-colored mat or paper to spot tiny parts quickly
If you’re gifting the kit, adding a small “mini build toolkit” (tweezers + glue tips + parts tray) turns it into a ready-to-start experience rather than a “wait until I buy supplies” project.
Assembly Experience: Time, Skill, and Setup
- Skill level: beginner-friendly for patient builders; more enjoyable with prior miniature or model-craft experience
- Time planning: break the build into short sessions (structure → details → lighting → final cleanup)
- Organization: sort parts before starting; label small piles to avoid mixing similar pieces
- Adhesive control: apply glue with a toothpick or micro-applicator to keep surfaces clean
- Dry-fit first: test the placement of walls, counters, and display pieces before gluing
A smooth build usually comes down to two habits: (1) dry-fitting anything structural before committing, and (2) letting glue cure fully before moving on to the next layer of details. When the counter, shelves, and “shop window” align neatly, the tiny bakery scene looks intentionally styled instead of crowded.
LED Lighting: Placement, Power, and Presentation
- Route the LED wiring (or placement path) early so it doesn’t conflict with walls, shelves, or the display counter
- Hide and secure the light source for a clean “shop window” effect
- Check the light before final sealing—confirm it turns on and the glow lands where it looks best
- Photography tip: the LED glow can highlight tiny textures; shoot in dimmer room light for a cozy bakery vibe
For a “real storefront” feel, aim the light so it washes over the baked-goods display area first, then softly fades toward the back wall. This gives the scene depth and makes the smallest details—labels, menu-style signage, and packaging accents—read clearly when viewed from the front.
Display Ideas for a Bakery “Food Box Shop” Look
- Use a small riser or book stack to place the diorama at eye level on a shelf
- Pair with other mini storefronts to build a “tiny street” collection
- Add a dust cover (clear acrylic box) if it will live on an open desk or near pets
- Seasonal styling: place it near warm-toned décor, fairy lights, or alongside a small plant for a café corner feel
If the diorama is going on a work desk, placing it slightly to the side of your monitor helps the LED read as an intentional “night light” accent rather than a distraction. It’s also a fun background piece for video calls—detailed enough to spark compliments, small enough to stay tidy.
Age Guidance, Safety, and Care
For additional guidance on small-part safety, reference the CPSC small parts regulations and the American Academy of Pediatrics tips on choking prevention. If kids are helping, consider a lidded parts organizer so everything gets put away between sessions.
Gifting Tips and Pairings
- Your Checklist for Writing a Children’s Book | Printable Author Guide (Digital Download) for a story-driven companion activity—name the baker, design a menu, and write a mini “opening day” scene.
- 90W Peak 50W RMS Bluetooth Speaker to set a cozy crafting atmosphere with café playlists or calming background audio during assembly sessions.
FAQ
Does the LED light come with the kit, and does it need special tools to install?
The kit includes the LED component(s), and installation is typically straightforward during assembly. Tweezers help with placing small parts and routing the light path neatly, and it’s best to test the LED before you close up or permanently seal sections.
How long does it take to finish a miniature bakery diorama like this?
Most builders finish in a few hours across one day, while more detailed, careful builds often take several short sessions over a weekend. Splitting the process into structure, details, and lighting (with drying time between steps) usually makes the experience smoother.
Is this kit suitable for children?
It can be a fun project for kids with adult supervision, but the small parts and glue make it better suited to older children who can follow careful instructions. Many families treat the finished piece as a display item rather than an everyday toy.


Leave a comment